What an eSIM QR code actually holds
A scan hands your phone a one-time credential, which is why the same square rarely works a second time.

Most pages on this topic show you a picture of a square and tell you where to point your camera. That square is only a container. What it carries is a short line of text with four or five named fields in it, and reading those fields explains almost every activation problem people run into.
What a scanned eSIM QR code hands your phone
An eSIM QR code is an ordinary QR code carrying one line of text called an activation code. That line names the server holding your plan and gives a matching ID that identifies your specific profile on it. Your phone reads the line, contacts the server, and downloads the profile over the internet.
That line is defined by the GSMA, the industry body that writes the eSIM rules every operator follows. Section 4.1 of SGP.22, the remote SIM provisioning specification for consumer devices, sets out the exact field order and the characters each field may use. The square itself is a plain QR symbol built to ISO/IEC 18004, the same standard behind a restaurant menu code.
Nothing about the image is special, which is why any scanner can read one. What matters is the text inside and the software that acts on it. Your handset runs a component the specification calls the LPA, short for Local Profile Assistant, and that is what recognises the string and starts a download.
Scanning is one way to deliver that string, and not the only one. SGP.22 requires a device to accept the same activation code typed in by hand, so the camera is a convenience. If you want the wider picture first, our explainer on what an eSIM is covers the hardware the profile lands on.
How each field in an eSIM QR code is used
A finished activation code looks like machine noise until you know where the dollar signs fall. Each one separates a named field, and the order never changes. Our companion piece on how an eSIM works covers what happens after the download finishes.
Read the example the specification publishes
GSMA prints a sample activation code in section 4.1 of SGP.22, and it reads 1$SMDP.EXAMPLE.COM$04386-AGYFT-A74Y8-3F815. Put the same string into a QR code and it gains one prefix, becoming LPA:1$SMDP.EXAMPLE.COM$04386-AGYFT-A74Y8-3F815.
The specification is explicit about that prefix. An activation code provided in a QR code is required to be prefixed with LPA:, while a code entered manually is used without it. A code copied out of a QR reader will therefore carry those four characters at the front, and a code emailed for typing usually will not.
SM-DP+ address is the server your plan lives on
After the leading format digit comes a fully qualified domain name, written as SMDP.EXAMPLE.COM in GSMA’s own sample. That is the address of the SM-DP+, the provisioning server that holds the profile your provider prepared for you.
SGP.22 restricts this field to the alphanumeric character set defined in ISO/IEC 18004 and excludes the dollar sign, which is reserved as the field separator. Providers publish this address on its own for manual setup, which is why a support email sometimes gives you a domain and a code as two separate boxes to fill.
Matching ID identifies your profile, and only yours
The third field is the matching ID, which the specification also calls the AC_Token. It is generated when your provider places the download order, and the server uses it to find the single profile tied to that order.
SGP.22 limits it to capital letters, the digits 0 to 9 and hyphens, noting that this keeps the QR encoding compact and keeps manual entry workable. The same section says the server may only process requests carrying a matching ID it already knows about.
Optional fields can follow the matching ID
A code may also carry the provider’s SM-DP+ OID and a confirmation code required flag, each introduced by another dollar sign. When that flag is present and set to 1, the server will ask for a separate confirmation code before it releases anything.
Version 3.0 of the specification added two more optional fields, an indicator naming the certificate authority root key and a delete notification used when a profile moves between devices. A whole activation code is capped at 255 characters unless that delete notification is present.
Why a used eSIM QR code stops working
A code moves your profile through a one-way sequence of states on the provider’s server. Once that sequence finishes, there is nothing left for a second scan to fetch. SGP.22 sets that sequence out step by step.
Track your profile through its states
Every profile sitting on an SM-DP+ server has a lifecycle. It runs Available, then Allocated or Linked, then Confirmed, then Released, then Downloaded, then Installed.
Your code only does anything while the profile sits in Released. At the download step, the server has to verify that the profile is in Released state, or in Downloaded state where an earlier install failed and you are retrying.
Anything else and the specification says the server returns an error and the procedure stops. A profile that has reached Installed is past the point where its code resolves to a download.
Attempts get counted too
For every profile in Released state the server keeps two counters, one for download attempts and one for confirmation code attempts. SGP.22 requires it to limit both.
Passing the download limit terminates the order outright and the provider is notified that it failed. Hammering a code that is not working can therefore end the order outright.
Treat the code itself as a credential
The server checks your device’s EID, the serial number of the eSIM chip, only if the download order was already linked to one, and that EID is an optional input when the provider places the order.
A travel eSIM is usually sold before anybody knows which handset will receive it, so there is often no EID on file to check against. In that case the matching ID inside the code is the whole of the authorisation.
Anyone who photographs your code before you scan it can install the plan on their own phone, unless your provider attached a confirmation code to the order. Never post one publicly, and think about where a screenshot of it ends up, including shared albums and automatic cloud backups.
Confirmation codes are the optional defence
SGP.22 defines a confirmation code as a code entered by the end user and required by the server to validate a download request. Providers choose whether to attach one, and most travel eSIMs do not.
Where one is set, the server has to guard against repeated wrong entries and terminate the order once the limit is passed. Your provider can then raise a fresh order for the same profile with the same code or a new one.
Scan an eSIM QR code on iPhone, Galaxy and Pixel
You need the code on a screen you can point a camera at, or saved as an image on the handset itself, plus a working internet connection at the moment you install. Menu wording differs by manufacturer and by operating system version, so each path below comes from that vendor’s own support page. Our activation walkthrough covers the wider setup once the profile lands.
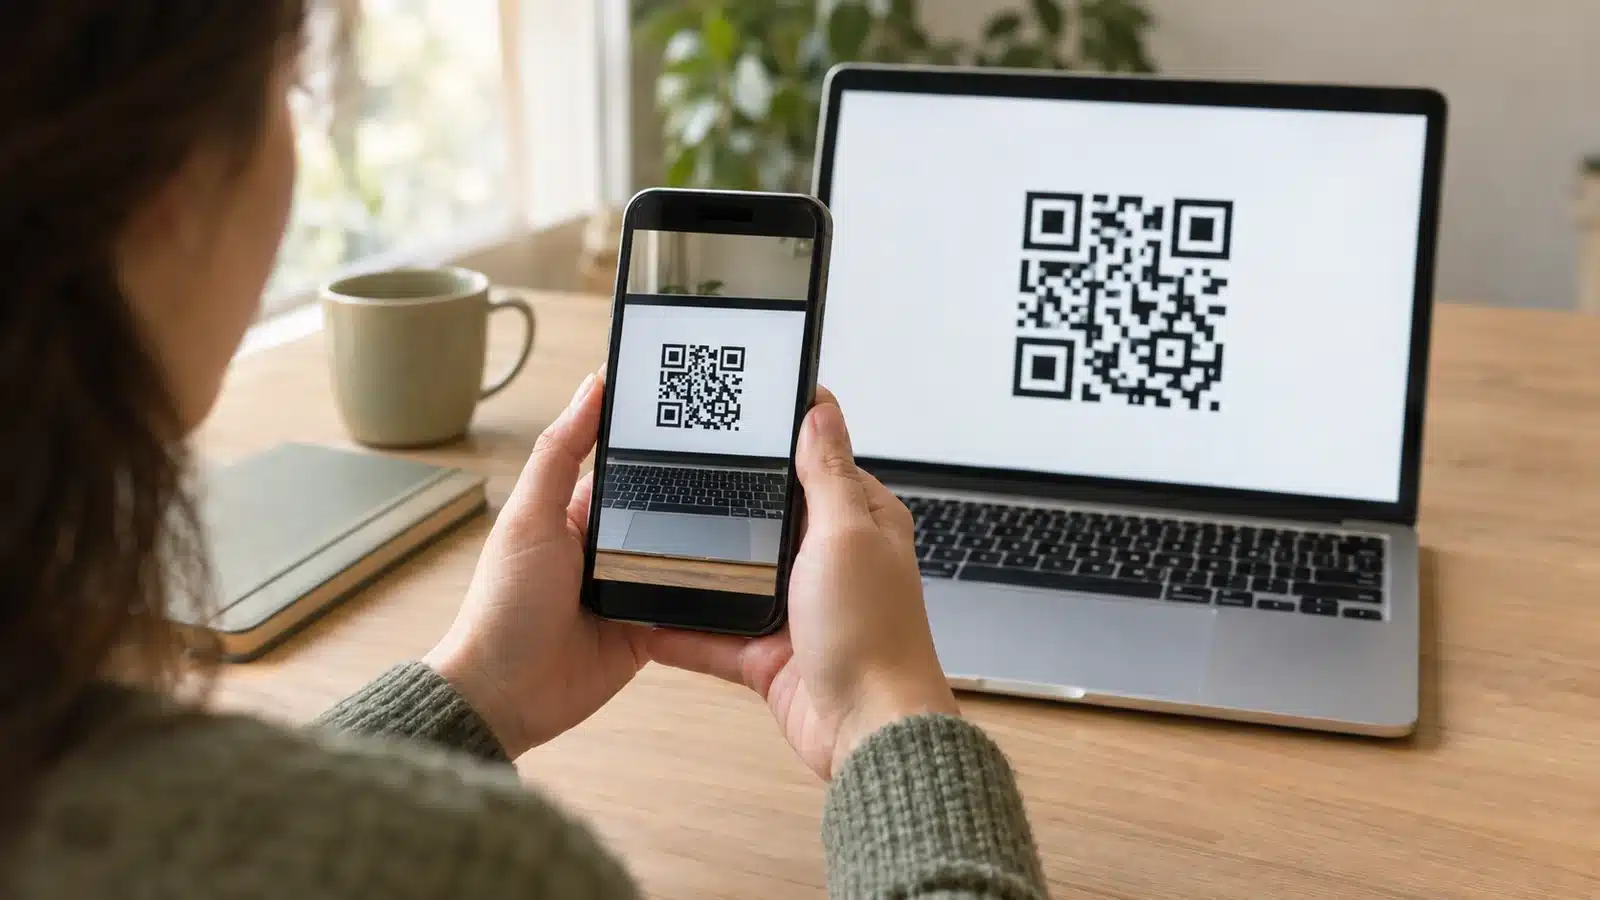
Step 1. Put the code where a camera can see it
Two screens make this trivial. Open the code on a laptop or a second phone, then scan it with the handset that will run the plan.
With one phone and nothing else, you will use a saved image or manual entry instead. Both are covered in step 5.
Step 2. Scan it on an iPhone
Apple documents two moments for this. During initial setup, tap Use QR code when the Set Up Cellular screen appears.
After setup, open the Camera app and scan the code, then tap the Cellular Plan Detected notification. Tap Continue at the bottom of the screen, tap Add Cellular Plan, and enter a confirmation code if you are prompted for one. Our iPhone guide covers the rest of the setup there.
Step 3. Scan it on a Samsung Galaxy
Samsung’s documented path is Settings, then Connections, then SIM manager. Tap Add eSIM, tap Scan QR code, and scan the code from your provider.
Samsung lists this alongside two other routes, a carrier-pushed setup and manual entry, so a Galaxy that will not scan still has somewhere to go.
Step 4. Scan it on a Pixel
Google’s path is Settings, then Network & internet, then SIMs, then Add SIM, then Set up an eSIM. During first-time onboarding the option reads Download SIM, then Set up.
Google adds that there may be slight differences depending on your carrier. Treat the prompts on your own screen as the authority over any written list, including this one.
Step 5. Install from a code you cannot scan
On iOS 17.4 or later, a code that arrives in the default mail app or browser can be touched and held, then installed by tapping Add eSIM. That clears the single-phone problem without a second screen.
Otherwise, type the string in. On iPhone that is Settings, then Cellular or Mobile Data, then Add Cellular Plan, then Enter Details Manually at the bottom of the screen.
On a Galaxy it is Settings, Connections, SIM manager, Add eSIM, Scan QR code, then Enter activation code. Android hands the string to the same LPA component either way, which parses an activation code whether it came from a scan or a keyboard.
Where eSIM QR code installs go wrong on iPhone and Android
Scanning the same code twice and expecting it to reinstall your plan
People delete a travel profile to tidy up, or reset a handset mid-trip, then go back to the original email and scan again. By that point the profile has reached Installed state on the provider’s server, and SGP.22 only permits a download from Released state, or from Downloaded state on a retry after a failed install. The server returns an error and stops.
Leave the profile on the phone rather than deleting it, even once the data runs out. If it has already gone, ask your provider to issue a new code instead of re-scanning the old one.
Re-scanning a failing code carries a cost. The server counts download attempts and terminates the order once your provider’s limit is passed, so a stubborn retry loop can kill an order that a support ticket would have rescued.
A manually entered code drops the LPA: prefix, and the matching ID contains only capitals, digits and hyphens. Anything in it that looks like a lower-case letter is being misread, so check it against the email before you blame the code.
Check connectivity before troubleshooting anything else
Scanning does not put a plan on your phone by itself. It starts a download from your provider’s server, so the handset has to be online at that moment.
Apple lists connecting to Wi-Fi or a hotspot among what you need for an eSIM, noting that in some countries eSIM-only iPhone models can activate without one. A code scanned in the air or in an airport with no usable connection will not complete.

Carrier locking surfaces at install time
A handset locked to one carrier will refuse a profile from another, and the failure tends to surface at install rather than at the scan. Apple’s check is Settings, then General, then About, where an unlocked iPhone reads “No SIM Restrictions” next to Carrier Lock.
Do that check before you travel, not at the gate. An unlocked phone is a precondition for any travel eSIM, whatever the code says.
Activate an eSIM by scan, by typing or by link
Providers hand over the same activation code three different ways, and which one suits you depends on how many screens you have in front of you. Every row below is taken from the GSMA specification or from Apple’s and Samsung’s own support pages.
| What differs | Scan a QR code | Type the code | Tap a carrier link |
|---|---|---|---|
| What you hold | The code on a screen you can point a camera at, or saved as an image | The SM-DP+ address and activation code as plain text | A link your provider sends instead of a code |
| Prefix on the string | Carries LPA: at the front | Entered without the LPA: prefix | Handled by the phone, nothing to type |
| iPhone path | Camera app, then the Cellular Plan Detected notification, then Add Cellular Plan | Settings, Cellular or Mobile Data, Add Cellular Plan, Enter Details Manually | Tap the link, tap Allow on Activate New eSIM, then Continue, on iOS 17.4 or later |
| Samsung Galaxy path | Settings, Connections, SIM manager, Add eSIM, Scan QR code | The same path, then Enter activation code | Not documented on Samsung’s eSIM support page |
| Works on a single phone | Only from a saved image, held down in mail or a browser on iOS 17.4 or later | Yes | Yes |
| Defined in the GSMA specification | Yes, section 4.1 sets the LPA: prefix and ISO/IEC 18004 encoding | Yes, devices are required to accept manual entry | No, SGP.22 v3.0 does not define it |
Where eSIMply fits when you download your eSIM
eSIMply sells travel eSIMs, so read this section as a disclosure. Plans are data only, they cover 200+ destinations, and the activation code arrives by email as soon as an order clears.
Everything above applies to that code exactly as it applies to anyone else’s, because the format belongs to the GSMA rather than to any provider. It names a server, it carries a matching ID, and it installs once.
No ID document is needed to buy, and support runs on chat and email around the clock if a code will not take. If you are still weighing the format itself, our eSIM and physical SIM comparison sets the two side by side.
Questions people ask about eSIM QR codes
These are the questions search engines surface alongside this topic, plus the ones the pages currently ranking for it publish themselves. Answers stay inside what the GSMA specification and the handset makers actually document.
Normally no. The activation code only works while your profile sits in Released state on the provider’s server, and installing it moves the profile to Installed, where the download check fails.
SGP.22 allows one exception, a retry when an earlier install failed and the profile is still in Downloaded state. That covers an interrupted install, not a deliberate second install on another handset.
The GSMA specification sets no expiry date on an activation code. What it does set is the state test and a limit on download attempts, both enforced by the provider’s server.
Validity windows you see advertised are the provider’s own policy, not a property of the code. Check the terms you bought under, because they differ between sellers.
A code is one delivery route out of three. Providers can also send the SM-DP+ address and activation code as text for manual entry, or a link you tap on the phone itself.
Apple documents the link route on iOS 17.4 or later, where tapping it raises an Activate New eSIM prompt. Samsung documents a carrier-pushed setup that needs neither a code nor a scan.
It comes from whoever sold you the plan, not from your phone. Most travel providers email it on purchase and keep a copy in your account area.
Your handset cannot generate one for a plan you have not bought. If it has not arrived, chase the order instead of digging through the settings menu.
On iOS 17.4 or later, save or open the code in the default mail app or browser, touch and hold it, then tap Add eSIM. No second screen is involved.
On an iPhone with no second device to hand at all, tap “Enter Details Manually” at the bottom of the Add Cellular Plan screen and type the SM-DP+ address and activation code in yourself.
On Android, type the details in instead. Samsung’s route is Settings, Connections, SIM manager, Add eSIM, Scan QR code, then Enter activation code, which takes the SM-DP+ address and the code as text.
Either path reaches the same server, so the cellular network you land on is identical. The Android operating system and the iPhone eSIM stack both hand the string to the same profile assistant whether you scanned it or typed it.
Treat it like a password. The server only checks your device’s EID if the order was linked to one beforehand, and travel plans are usually sold before the handset is known.
That leaves the matching ID inside the code doing the authorising on its own. Anyone who captures the image first can install the plan, unless your provider attached a confirmation code to the order.
The profile goes, and the original code will not bring it back, because the server has already recorded it as installed. A tidy-up that removes the profile therefore costs you the plan.
Keep an unused or part-used travel profile in place and simply turn the line off. On an iPhone that lives under Settings then Cellular, where each plan can be switched off without removing it.
Only if your provider issues a new one. The original code is spent, and a transfer is a separate operation the carrier has to permit.
Apple’s eSIM Quick Transfer and Samsung’s eSIM Instant Transfer both move a line between handsets without a code at all. Our transfer guide walks through both.
Check device compatibility before anything else. An older smartphone or tablet may carry no eSIM hardware at all, and Apple and Samsung both publish device support lists showing which models support eSIM. Apple sets its floor at iPhone XS, iPhone XS Max, iPhone XR or later.
Where the handset qualifies, troubleshooting is short. Confirm the phone is online, give it a quick restart, and if the camera still refuses the image, move to manual activation instead.
On a Galaxy, follow these steps: open “Settings”, tap “Connections”, tap “SIM manager”, tap “Add eSIM”, tap “Scan QR code”, then select “Enter activation code” and paste the string your service provider sent. On any other Android device the wording shifts, so follow the prompts on your own screen.
Yes. An eSIM profile needs an embedded SIM chip inside the handset, and no activation code can add one to a device that does not have it.
A digital SIM does not replace the tray on models that still have one, so a physical SIM card and an eSIM can run together where the manufacturer allows it. Your IMEI, the International Mobile Equipment Identity printed in your phone settings, is what a carrier asks for when it checks.
Travelling without the need for a physical SIM is most of the appeal here. You land connected without a physical card in hand and without a counter queue at the airport.
Your new cellular profile sits alongside any physical SIM card already in the phone, and network settings decide which line carries mobile data. On an iPhone that sits under Settings, then “Cellular” or “Mobile Data”.
If the handset cannot find a signal, turn data roaming on for the travel line. A travel plan reaches you through a partner network’s cell towers rather than your home carrier’s, so roaming has to be permitted for that profile.
Mobile broadband normally comes up within a minute or two of landing. Where it does not, a quick restart usually clears it and connectivity returns.
Go back to whoever sold the plan. They can see the order state on the server and reissue it when a code activation never completed, which no amount of retrying on your side will fix.
Most sellers publish a tutorial on how to activate an eSIM with a QR code for each platform, and many run a mobile app that can download your eSIM without a scan at all. Keeping the original email matters, because anyone helping will ask for the order reference before they can get an eSIM QR code reissued.
A local eSIM bought at your destination goes through exactly the same steps, since the format belongs to the GSMA. Apple and Google both describe the same routes in their own wording.
That depends on the plan behind the code, never on the code itself. A single-country plan will not roam past its home network, while a regional plan will activate across the list of countries its provider publishes.
Browse the destination you are actually going to before you buy, and read the country list on regional plans in full. Where you are travelling internationally across several borders, one regional plan saves installing a fresh profile at each one.
Apple makes the same point for local plans bought on arrival, which are tied to the carrier you bought them from. A prompt to enable data roaming usually appears the first time the line connects abroad.
Where these details come from
Every technical claim on this page was read in the document that defines it, and the link sits inline where the claim is made. No testing rig was involved and no speed figures are quoted.
- Code structure and behaviour: GSMA SGP.22 RSP Technical Specification v3.0, sections 4.1 and 4.1.1 for the activation code fields and the matching ID, section 3.1.3 for the download checks and attempt counters, section 3.1.6 for the profile state diagram, and section 4.7 for confirmation codes.
- QR encoding: ISO/IEC 18004:2015, the QR Code bar code symbology specification that SGP.22 references for the symbol itself and for the permitted character set.
- iPhone menu paths: Apple’s Set up eSIM on iPhone page for the scan, link and manual entry routes, and its Use eSIM while traveling internationally page for the carrier lock check.
- Android menu paths: Samsung’s Galaxy eSIM support page for Galaxy and Google’s Set up a new eSIM page for Pixel, cited separately because the wording differs by manufacturer and by operating system version. The Android Open Source Project eUICC documentation covers what the LPA does with the code once it has it.
- Reader questions: the People Also Ask results for this keyword, plus the question sets published by the pages currently ranking for it.
Two disclosures. eSIMply sells its own travel eSIM, so the section describing it is a vendor talking about its own product, and the plan links on this page are commercial links that can earn us a commission.
No GSMA or handset maker page states in plain words that an activation code should be kept private. The security point above is built from the specification’s own mechanics instead.
Jamie has worked in telecommunications for more than 8 years across mobile, SMS, eSIM, apps, and adjacent technology. He now writes for eSIMply as the tech content writer, analysing the top eSIM providers and breaking down what travellers actually need to know.
While we do our best to ensure accuracy, prices and plan availability are subject to change. Last updated by Jamie Cole.